> For the complete documentation index, see [llms.txt](https://docs-jmapserver-lima.k2geospatial.com/llms.txt). Markdown versions of documentation pages are available by appending `.md` to page URLs; this page is available as [Markdown](https://docs-jmapserver-lima.k2geospatial.com/e/applications/jmap-ng-user-guide/the-data/data-layers/filter-elements-on-the-map.md).
# Filter Elements on the Map
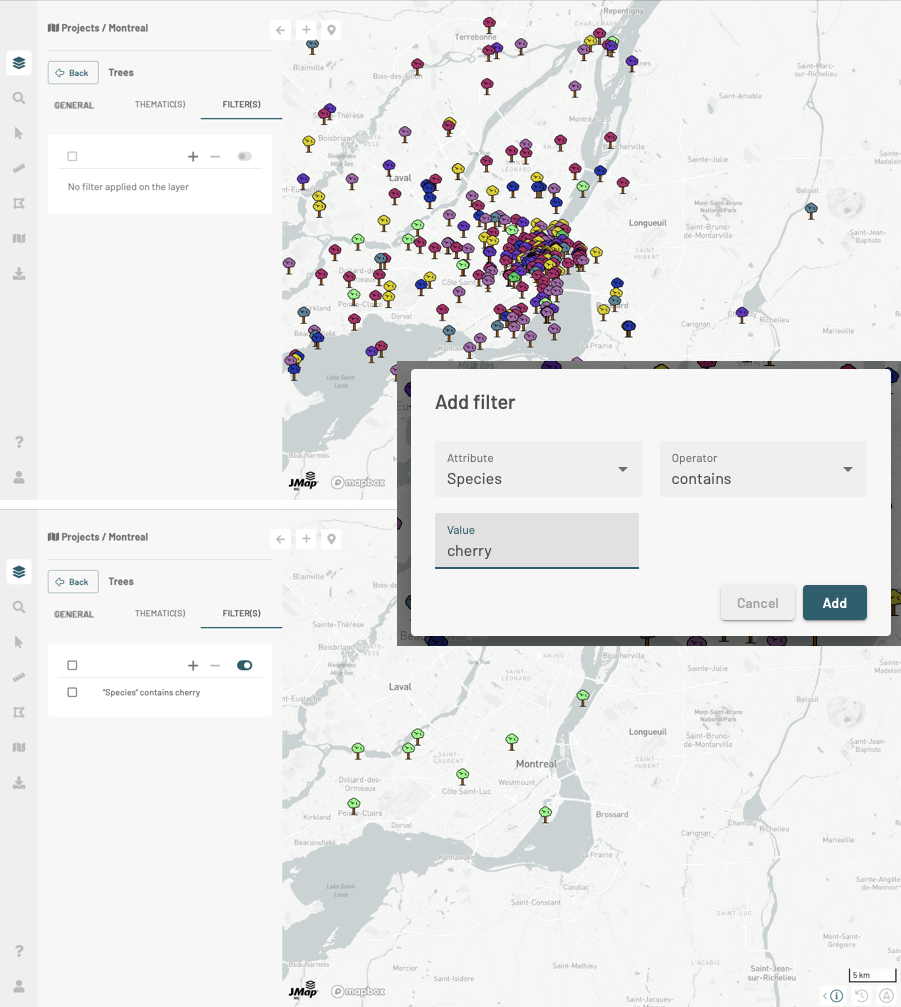
You can configure filters to display only some elements of the layer. To configure and apply filters:
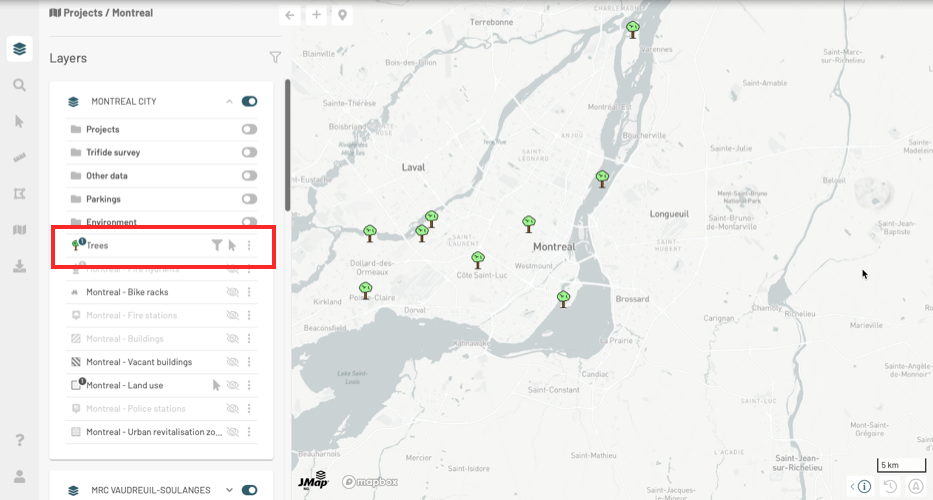
1. Click on and then on  **Filter elements on the map** to open **FILTER(S)** panel.
2. Click on to open the **Add filter** interface.
3. Select the attribute, the [operator](#filter-operators) and the attribute value(s).
4. Press **Add**. Only items in the layer that pass the filter are displayed on the map.
5. Click on the filter to open the **Update Filter** interface.
6. Click on to add a filter.
7. Check a filter to select it.
8. Click on to clear it or on to disable.
The icon displayed in the layer card indicates that this one has an active filter. Configured filters are enabled by default.
## **Filter operators**
**equal to**: This operator filters a layer’s elements to display the elements whose attribute value (regardless of its type) is equal to one of the values selected by the user.
**not equal to**: This operator filters a layer’s elements to display the elements whose attribute value (regardless of its type) is different from the values selected by the user.
**contains**: This operator filters a layer’s elements to display the elements whose attribute value (text) contains the value selected by the user.
**does not contain**: This operator filters a layer's elements to display the elements whose attribute value (text) does not contain the value selected by the user.
**is empty**: This operator filters a layer’s elements to display the elements whose attribute (text) does not have a value.
**is not empty**: This operator filters a layer’s elements to display the elements whose attribute (text) has a value.
**is null**: This operator filters a layer’s elements to display the elements whose attribute value (regardless of its type) is null.
**is not null**: This operator filters a layer’s elements to display the elements whose attribute value (regardless of its type) is not null.
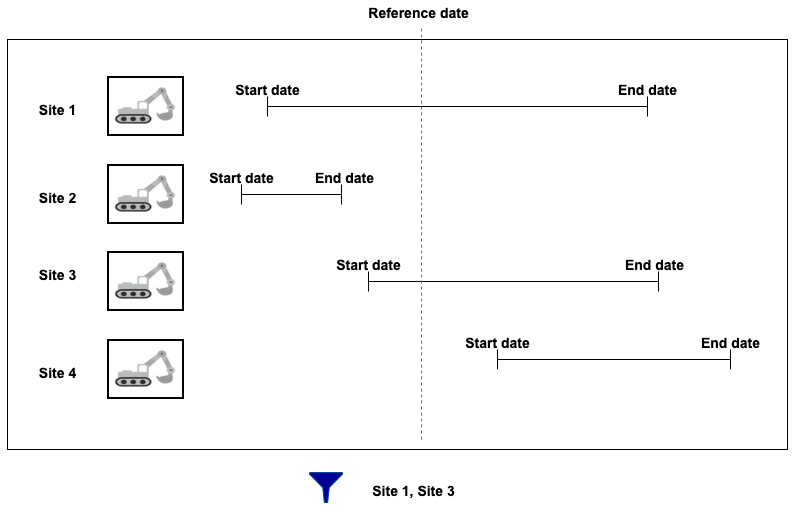
**interval**: This operator filters a layer's data based on time ranges defined using a start date, an end date and a reference date. The user therefore has a tool to display data that varies over time.
The layer must contain at least two date and/or timestamp attributes, one of these being the start Date/Time, and the other being the end Date/Time. The values of these dates can be NULL to indicate a start date that goes a long way back or an end date that is very far in the future.
A reference date is also needed. This date can be a specific date (in the past or in the future) or a current Date/Time, which indicates the present moment.
Only layer elements whose reference date is between the start and end date are displayed in the map.
{% hint style="info" %}
You need to select the attribute that indicates the start date and then select the Interval operator. Then you select the end date of the interval and the reference date.
{% endhint %}
The following figure illustrates this filter.
 and then on  **Filter elements on the map** to open **FILTER(S)** panel.
2. Click on
and then on  **Filter elements on the map** to open **FILTER(S)** panel.
2. Click on  to open the **Add filter** interface.
3. Select the attribute, the [operator](#filter-operators) and the attribute value(s).
4. Press **Add**. Only items in the layer that pass the filter are displayed on the map.
to open the **Add filter** interface.
3. Select the attribute, the [operator](#filter-operators) and the attribute value(s).
4. Press **Add**. Only items in the layer that pass the filter are displayed on the map.
 to clear it or on
  to disable.
The icon
to disable.
The icon  displayed in the layer card indicates that this one has an active filter. Configured filters are enabled by default.