# Navigating on the Map

The following tools allow you to navigate on the map.

## Navigation tools

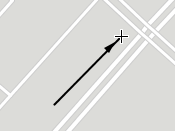
<table data-header-hidden><thead><tr><th width="92"></th><th></th></tr></thead><tbody><tr><td><img src="/files/UwUNAF5jsfexZwy3yc1T" alt="" data-size="original"></td><td><strong>Zoom extent</strong><br>Adjust map in order to display the whole of a project's data.</td></tr><tr><td><img src="/files/ASI4PtFrfqf2JVT2NJH4" alt="" data-size="original"></td><td><strong>Zoom initial bounds</strong><br>Returns to the view that was displayed upon opening the project.</td></tr><tr><td><img src="/files/l9MxyO4Gll3WQHtzgxpy" alt="" data-size="original"></td><td><strong>Zoom in</strong><br>Click on desired area of map to enlarge by a factor of 2.<br>Trace a rectangle to enlarge the chosen area.</td></tr><tr><td><img src="/files/w23Cl1yDrLtZwRnpuJiN" alt="" data-size="original"></td><td><strong>Zoom out</strong><br>Click on desired area of map to decrease size by a factor of 2.<br>Trace a rectangle to decrease size around the chosen area.</td></tr><tr><td><img src="/files/qzfnvQ4dv8vsfPN7yrvZ" alt="" data-size="original"></td><td><strong>Pan</strong><br>Move map by dragging it with the mouse.<br>Click to center map view around the desired point.</td></tr><tr><td><img src="/files/nShkOCa7VR62KG17rfNT" alt="" data-size="original"></td><td><strong>Backward</strong><br>Return to previous view (the last 64 views are memorized).</td></tr><tr><td><img src="/files/id8mnGcKRd6HpJh5NH4X" alt="" data-size="original"></td><td><strong>Forward</strong><br>Return to the view that was displayed before clicking on <strong>Backward</strong> (last 64 views are memorized).</td></tr><tr><td><img src="/files/KgORCXNT8paHJxCX9E8W" alt="" data-size="original"></td><td><strong>Zoom to selection</strong><br>When objects are selected, adjusts map in order to display all selected data.</td></tr><tr><td><img src="/files/6ko4ZY7iUlziRt6NanZu" alt="" data-size="original"></td><td><p><strong>Rotation by points</strong><br>Define map orientation by tracing a line defined by 2 points. <br>The first point determines the orientation of the bottom portion of the map and the second point (pointed by the arrow) determines the orientation of the top of the map.</p><p><img src="/files/5JNycXgdKTb7EzzzKNfp" alt="" data-size="original"></p></td></tr><tr><td><img src="/files/Ekvv2UKuyPagiK7bQ1M8" alt="" data-size="original"></td><td><strong>Apply default map rotation</strong><br>Cancels map rotation and returns map to its normal orientation.</td></tr></tbody></table>

## Geographic information

The map's status bar displays geographic information about the view:

**Scale**

This ratio indicates the relationship between a distance on the map and the actual distance on the ground. It varies as you zoom in and out.

**Zoom**

This value indicates the width of the area displayed on the map, measured vertically at the center of the window. Zoom varies depending on the window size and scale.

**X and Y**

Cursor coordinates, in the map's projection system.

## Reaching specific coordinates on the map

It is possible to reach specific coordinates on a map.

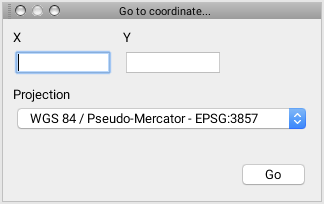
1. Click on the coordinates that appear in the status bar to display data entry window or select **Tools -> Go to coordinate...** or press **CTRL-G**.
2. If desired, select the coordinate system (projection) to be used.
3. Enter coordinates to be reached.
4. Press **Go**.

The map centers itself around the requested coordinates, which are indicated by an arrow-shaped marker.

<figure><img src="/files/KgmkGJkldQ1xfjBs1xdB" alt="" width="375"><figcaption></figcaption></figure>

## Navigating using the map overview

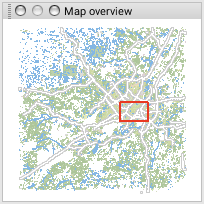
The map overview can be used to navigate on the map. In order to display it:

1. Go to **View -> Map overview** or press **CTRL-O**. Once it is activated, the map overview is saved in the user's parameters.
2. Click in the map overview to re-center the map around the desired position.
3. Drag the red rectangle to change the area displayed on the map.

<figure><img src="/files/yCGcQVYHO5WqFQ0GkTzM" alt="" width="375"><figcaption></figcaption></figure>

{% hint style="info" %}
Once enabled, the overview state remains saved in the user settings.
{% endhint %}

## Copy pointer coordinates to clipboard&#x20;

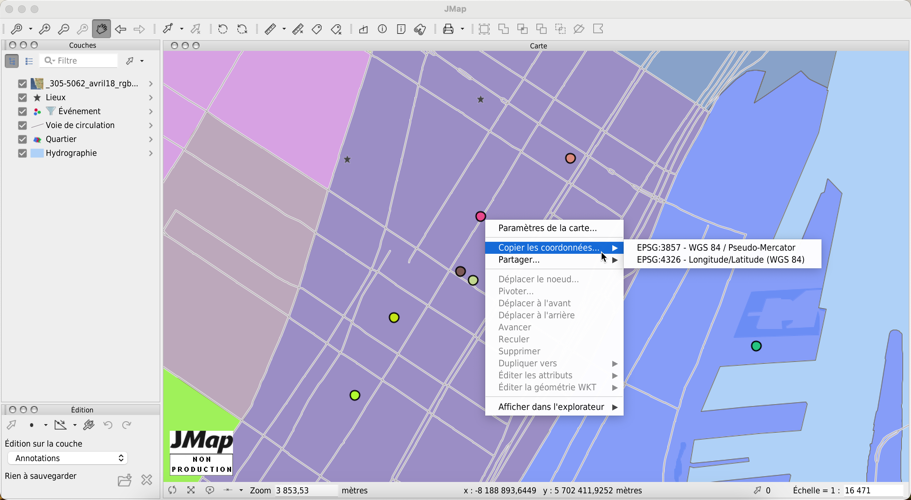
You can copy the pointer coordinates to the clipboard. To do this:&#x20;

1. Position the pointer at the desired location and right-click to display the context menu.&#x20;
2. Click Copy coordinates... to display the available projection systems.&#x20;
3. Select the projection system by clicking on it. The coordinates are copied to the clipboard. You can copy them wherever you want.<br>

   <figure><img src="/files/MikIPZn3MVtWsGpdIy17" alt=""><figcaption></figcaption></figure>


---

# Agent Instructions: Querying This Documentation

If you need additional information that is not directly available in this page, you can query the documentation dynamically by asking a question.

Perform an HTTP GET request on the current page URL with the `ask` query parameter:

```
GET https://docs-jmapserver-lima.k2geospatial.com/e/applications/jmap-pro-user-guide/introduction/navigating-on-the-map.md?ask=<question>
```

The question should be specific, self-contained, and written in natural language.
The response will contain a direct answer to the question and relevant excerpts and sources from the documentation.

Use this mechanism when the answer is not explicitly present in the current page, you need clarification or additional context, or you want to retrieve related documentation sections.