The following screen captures show the graphical user interface of JMap Admin. The different parts of the interface are described below.
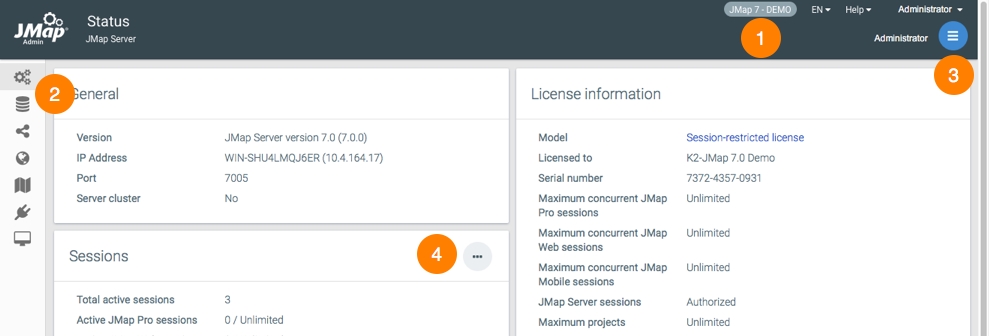
1
You can specify the name of the JMap Server. The Help menu allows you to access this manual, the manuals of the extensions installed on the server, and the K2 Geospatial Knowledge Base.
You can select the display language of JMap Admin. The language chosen in this menu as well as the language chosen in the connection interface is saved by JMap, which displays it by default in subsequent sessions.
The user account name of the JMap Admin session. You can change the account password and log out of the session.
2
The sidebar allows you to access the main sections of JMap Admin.
3
The menu varies depending on the context and allows you to open the subsections.
4
Shortcut buttons allow you to access a specific section quickly.
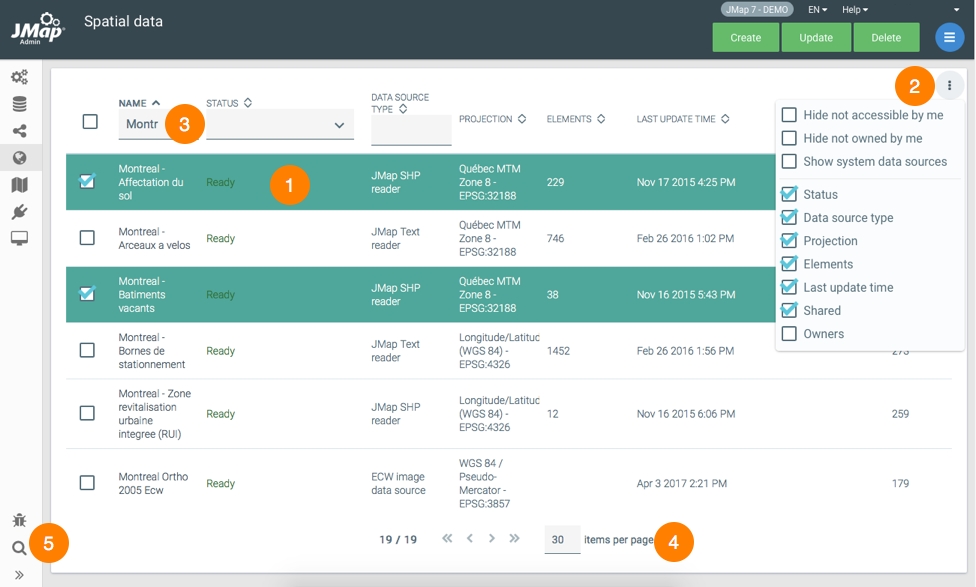
1
Lists allow you to select items.
2
List options allow you to select the fields displayed in the list.
3
Filters for certain fields allow you to filter the contents of the list.
4
You can navigate through the pages of the list or modify the number of items per page.
5
The search tool allows you to locate resources by name in JMap Admin.
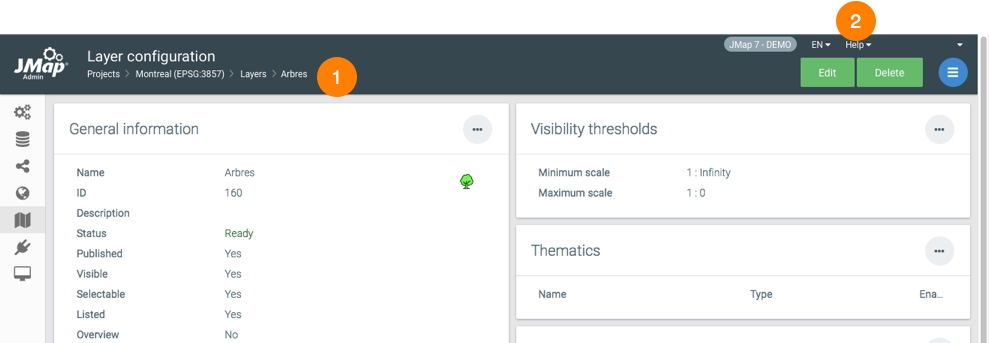
1
A breadcrumb trail allows you to navigate through JMap Admin.
2
The administrator manual can be accessed via the Help menu.
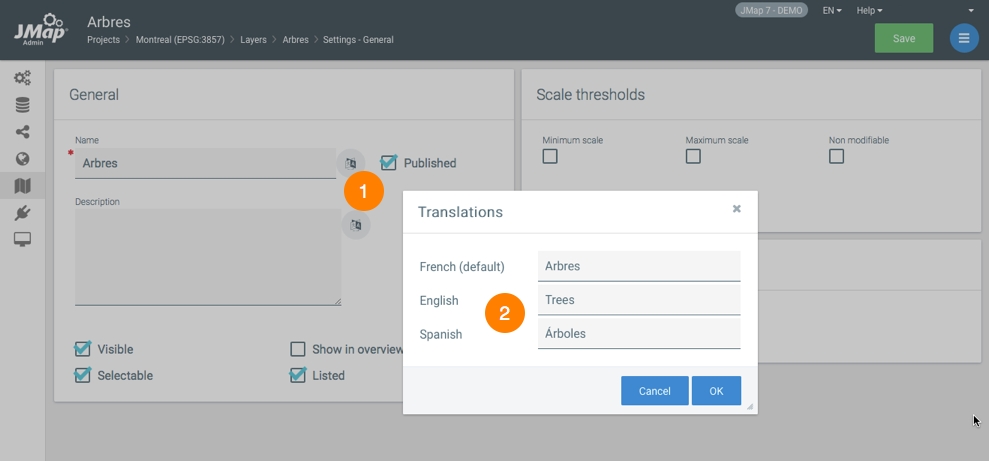
1
When this button is displayed, it indicates that you can add translations for the various languages you want the system to support.
2
Each resource can be translated into several languages.
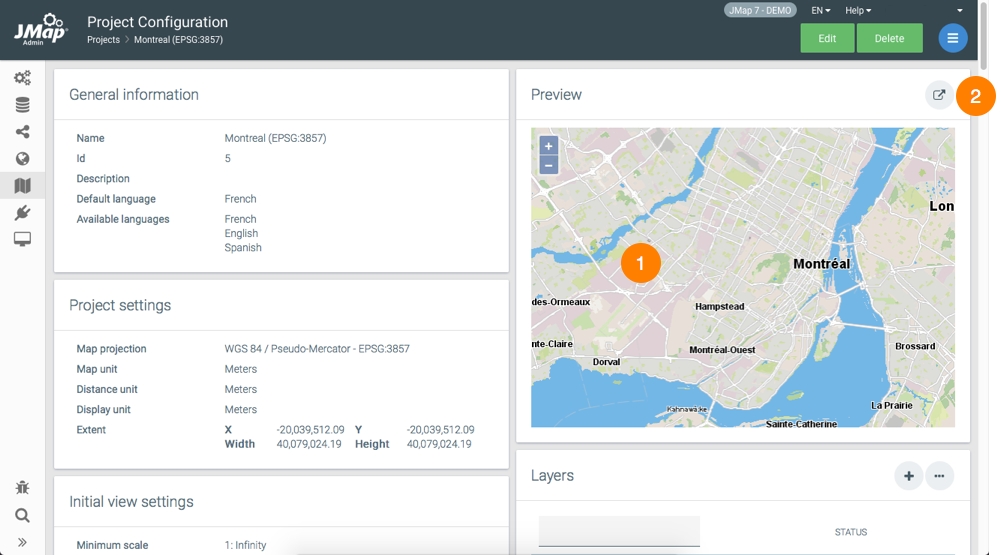
1
JMap Admin provides a preview of each project at all times, as you make changes to it.
2
You can open your project with JMap Web or JMap Pro without leaving JMap Admin.
JMap Server Lima offers a new user interface. The following screen captures show the graphical user interface of JMap Admin.
Most sections of JMap Admin offer an interface containing a table of section resources, with basic information and buttons for resource management.
Filter ranges allow you to find your information when lists of values are available:
Icons are used in all interfaces to perform common tasks:
1
The table displays resources in rows. Click on the name of a resource to access its configuration interface.
2
Options allow you to select the fields displayed in the table.
3
Filters for certain fields allow you to filter the contents of the table. You can sort the resources in the table based on their values for different fields.
4
You can navigate the table pages and change the number of items per page.
5
The available functions are displayed in the top bar.
1
A breadcrumb trail allows you to navigate through JMap Admin.
1
JMap Admin provides a preview of each project at all times, as you make changes to it.
2
You can open your project with JMap NG or JMap Web without leaving JMap Admin.
1
2
Each resource can be translated into several languages.
OK.
Cancel.
Open the section.
Reload section.
Develop section.
Add.
Delete.
Allows access to other functions.
Allows access to table display settings.
In the header of the columns of a table, indicates the sorting function (ascending or descending) of the elements according to the values of the column.
1
You can specify the JMap Server name in the JMap Server Settings section.
2
You can select a light or dark interface.
3
You receive notifications, particularly when new versions of the JMap Server products comprising your license are available.
4
This section gives you access to this manual, examples, the Knowledge Base and the K2 Geospatial Customer Portal. From there you can communicate with the Service team responsible for technical support.
5
This section allows you to:
Select the JMap Admin display language. The language chosen in this menu as well as the language chosen in the connection interface is recorded by JMap Admin which displays it by default during subsequent sessions.
Change account password.
Change GUI to old version.
Disconnect from the session.
6
The sidebar allows you to access the main sections of JMap Admin. These are grouped by theme: Resources, Deployment, Tools, Extensions, JMap Server.
7
Shortcut buttons allow you to access a specific section quickly
8
This button allows you to reload the license.
When this button is displayed, it indicates that you can add translations for the various languages you want the system to support.
/


