JMap Pro and JMap Server Development
The purpose of this section is to guide Java developers in developing mapping applications based on JMap Pro and JMap Server 7 using JMap’s Java API.
Although the JMap Pro application can be customized, it is strongly recommended to implement all new features and customizations by developing extensions with JMap’s Java API.
JMap Pro is a Java-based client application. It can run as a Java applet in a browser, as a standalone JavaWebStart (JNLP) application or as a standalone application launched at the command line (which is especially useful for development). In all cases, the application is the same, and all extensions developed are compatible.
JMap Server is a server application developed in Java. You can develop extensions for JMap Server using JMap’s Java API.
Setting up the Environment
Ant
For programming, the JMap 7 SDK uses Ant to perform various tasks using scripts. Ant can be downloaded from http://ant.apache.org.
When used from Eclipse, Ant may be unable to find the Java compiler in order to compile classes. In such a case, you must add a reference to the tools.jar library provided with the Java JDK in the Ant configuration. For more information, refer to this article: http://wiki.eclipse.org/FAQ_Why_can’t_my_Ant_build_find_javac%3F.
Eclipse
Eclipse is the preferred Java development environment for JMap. It can be downloaded from this address: http://www.eclipse.org. However, it is quite possible to develop JMap applications using the environment and tools of your choice. The following information applies to the Eclipse Luna (version 4.4) environment.
Integrate JMap 7 SDK as an Eclipse project
To simplify development, it is recommended to integrate the JMap 7 SDK as an Eclipse project. Your development should be in projects that are separate from the SDK to keep it intact as a source of reference.
In an Eclipse worskpace (existing or new), create a Java project for the JMap 7 SDK.
File -> New -> Java Project
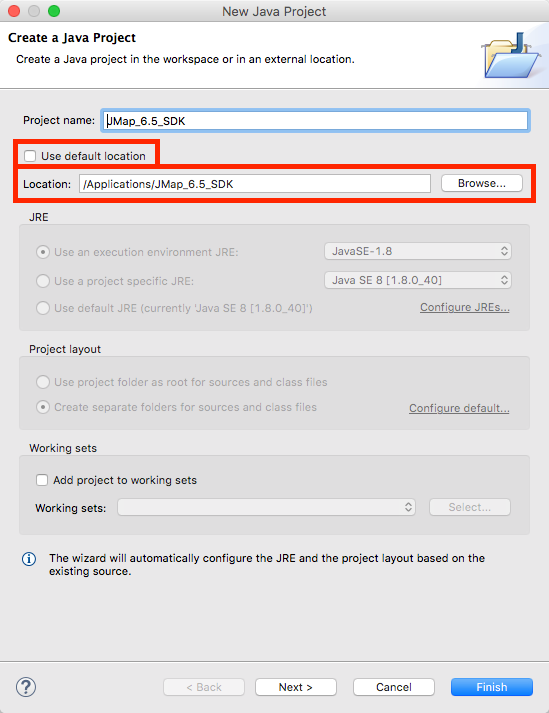
Select the path of the JMap 7 SDK that was specified when it was installed. To do this, you must disable the Use default location option to let Eclipse browse a folder outside of the current workspace. The project name is set automatically when the folder is selected.
Press Finish.

Create a new project
To start new development work using the JMap 7 SDK (such as creating a new JMap extension), it is recommended to create separate projects. Each new project should point to the libraries distributed with the SDK to allow for compilation. The example below shows how to create a new JMap project.
In the same Eclipse workspace containing the project for the JMap 7 SDK, create a new Java project.
File -> New -> Java Project
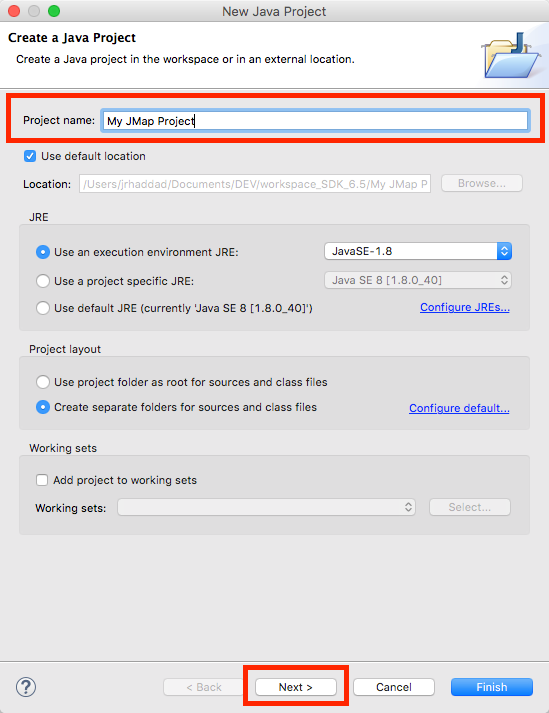
Give your project a name then press Next.

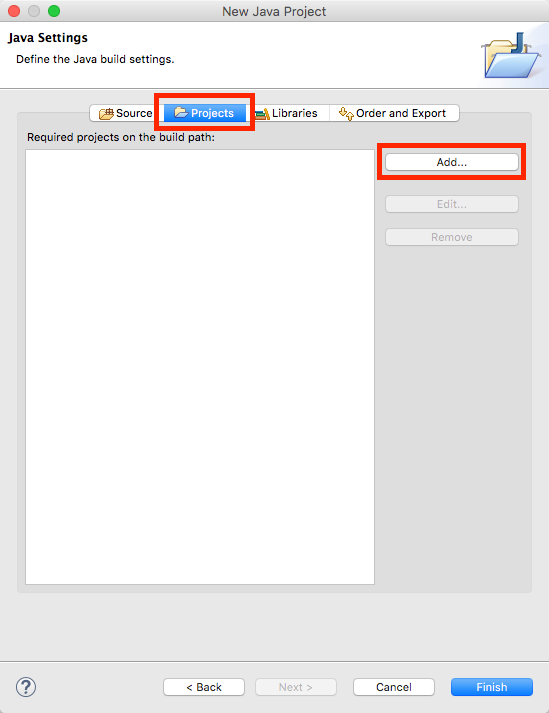
Select the Projects tab and press Add.

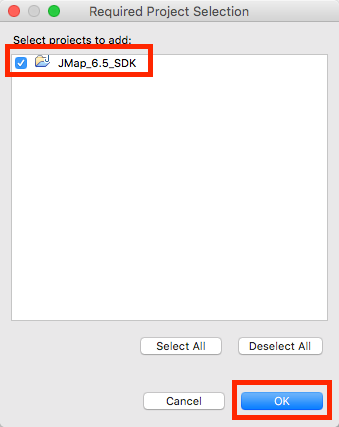
Select the JMap SDK project. All of the SDK’s libraries will become available for your project. Press OK.

Press Finish.
Examples
The JMap 7 SDK comes with many examples located in the JDK_HOME/examples folder.
The Ant script build_examples.xml is used to compile and run the examples.
Many simple examples can be run in JMap Pro from a unique GUI using the Showcase extension.
The Hello World extension demonstrates a basic JMap Pro client extension that communicates with a JMap Server extension.
The Webextensions extension shows how to develop an action that can respond to JMap Web queries (refer to JMap Web Development).
Mis à jour