Old User Interface
The following screen captures show the graphical user interface of JMap Admin. The different parts of the interface are described below.
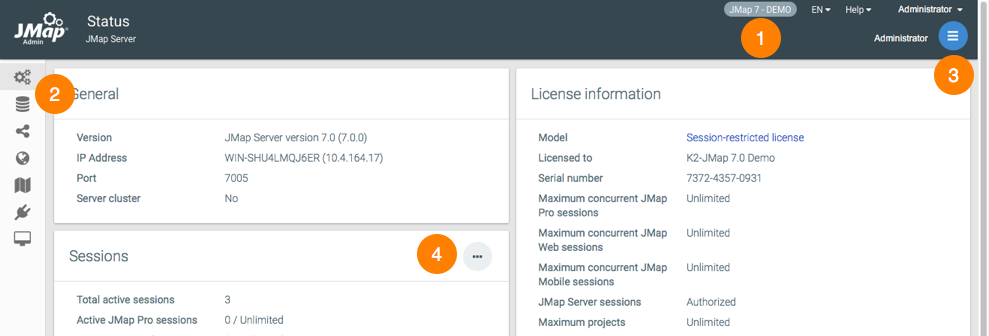
1
You can specify the name of the JMap Server. The Help menu allows you to access this manual, the manuals of the extensions installed on the server, and the K2 Geospatial Knowledge Base.
You can select the display language of JMap Admin. The language chosen in this menu as well as the language chosen in the connection interface is saved by JMap, which displays it by default in subsequent sessions.
The user account name of the JMap Admin session. You can change the account password and log out of the session.
2
The sidebar allows you to access the main sections of JMap Admin.
3
The menu varies depending on the context and allows you to open the subsections.
4
Shortcut buttons allow you to access a specific section quickly.
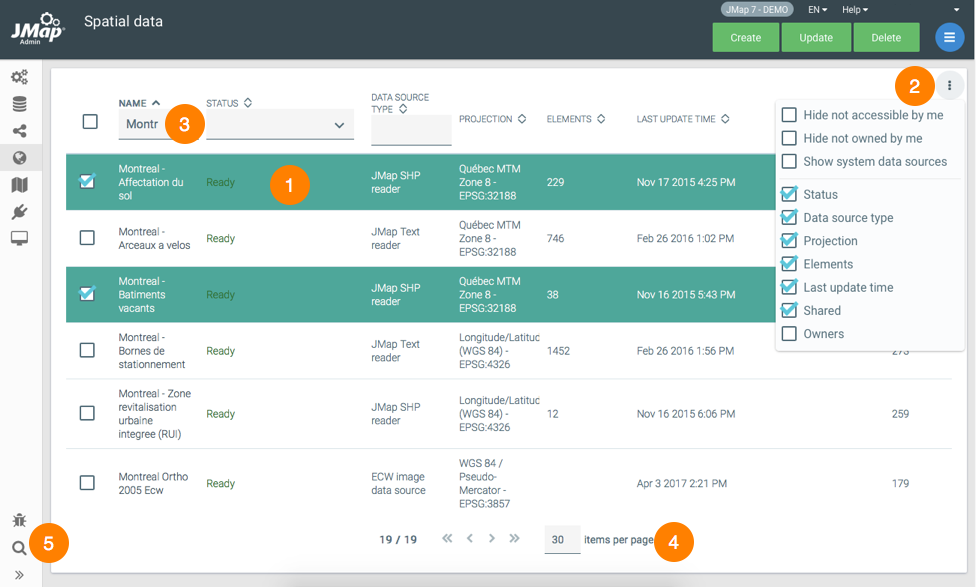
1
Lists allow you to select items.
2
List options allow you to select the fields displayed in the list.
3
Filters for certain fields allow you to filter the contents of the list.
4
You can navigate through the pages of the list or modify the number of items per page.
5
The search tool allows you to locate resources by name in JMap Admin.
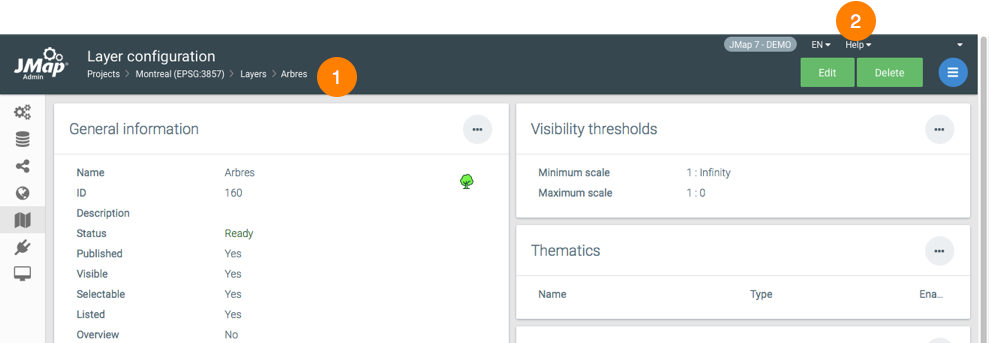
1
A breadcrumb trail allows you to navigate through JMap Admin.
2
The administrator manual can be accessed via the Help menu.
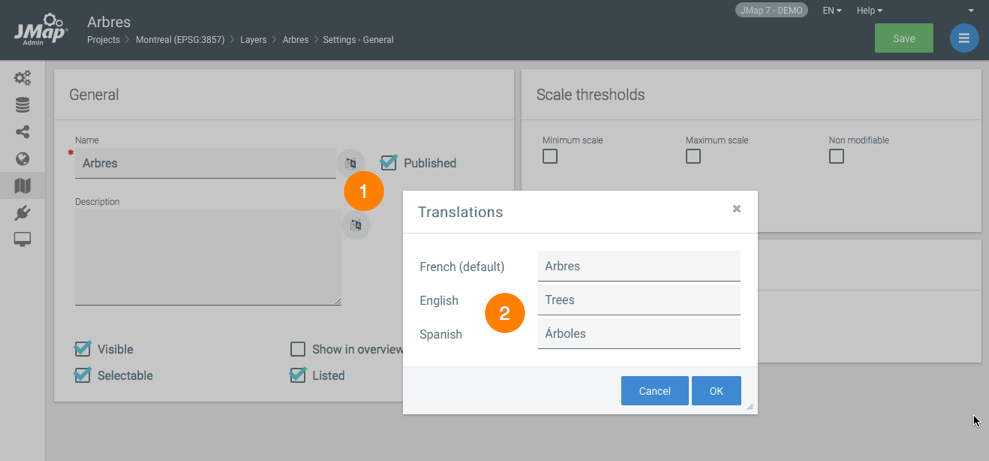
1
When this button is displayed, it indicates that you can add translations for the various languages you want the system to support.
2
Each resource can be translated into several languages.
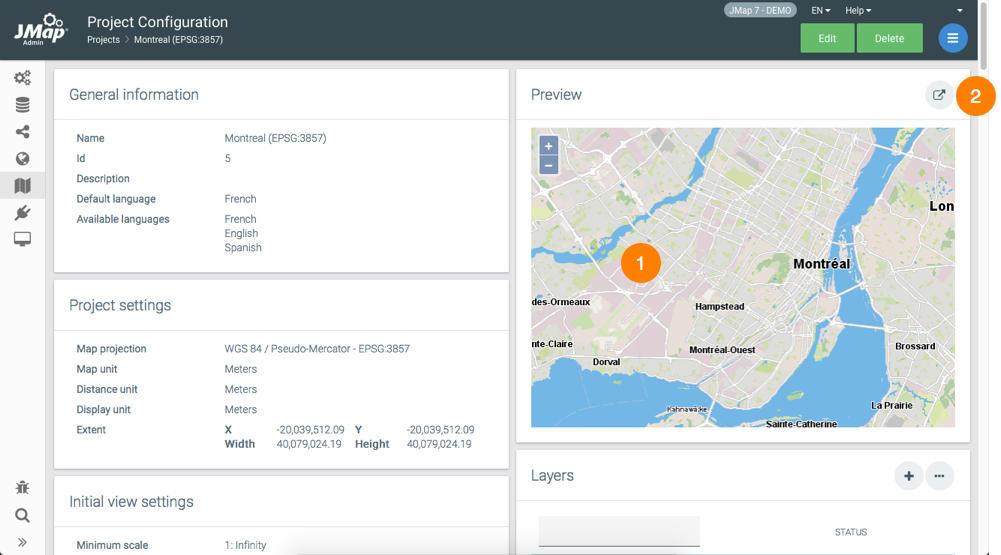
1
JMap Admin provides a preview of each project at all times, as you make changes to it.
2
You can open your project with JMap Web or JMap Pro without leaving JMap Admin.
Mis à jour